La Belle Bride Guest Post: DIY Burlap Bouquet
LaBelle Bride brings you this guest post. I am still so excited that she's agreed to guest post
LaBelle Bride brings you this guest post. I am still so excited that she's agreed to guest post for us as I am constantly in awe of the blog's amazing posts. Full of inspiration, DIY ideas and real weddings, LaBelle Bride is a must stop for your wedding planning inspiration.
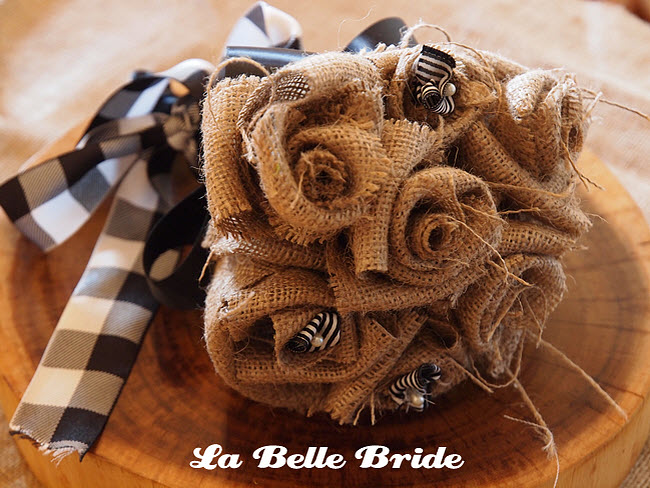
DIY DAY! We all love a good DIY but one that incorporates burlap is definitely a crowd pleaser! We came up with these DIY burlap flowers by complete fluke. We were actually going ot make cotton flowers but these ended up being so cute and rustic! They're perfect as a non-traditional bouquet or centerpiece additions.
I can't forget to mention that this bouquet costs $10 to make. A TEN DOLLAR WEDDING BOUQUET. And as ALWAYS - if I can make them, ANYONE can.

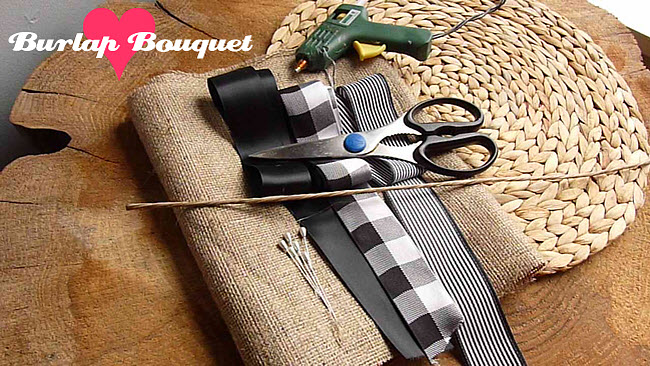
Materials:
Burlap
Scissors
Floral stems (we found cool paper covered ones at Michael's)
Ribbon
Glue gun
Pearl pins (optional)
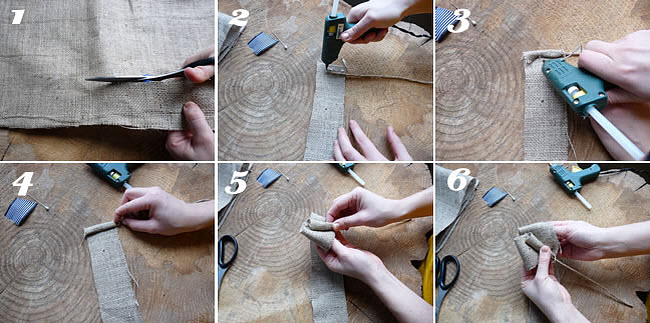
1. Cut a strip of burlap about 2 inches thick and a foot long (depending on how big you'd like your flowers)
2. Take your stem and glue the tip of it onto the very end of your strip
3. Begin to roll your stem into the burlap, gluing along the way
4. Continue rolling your stem about 4-5 times. This creates the center "bud" of your flower
5. Now it's time to start your petals! Take the fabric strip that is dangling from your "bud" and make a fold away from you, holding the bottom of the folding piece close to the stem
6. Overlapping your first "petal" slightly, create another backwards fold or petal. Again, holding the bottom of the fold near the stem
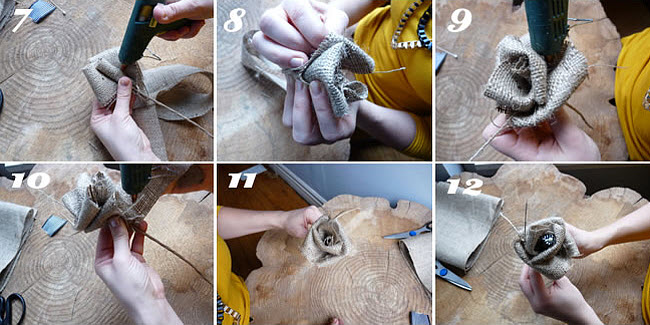
7. Glue your first two petals in place. Try to put the glue closer to the base of your flower
8. Continue steps 5-7 until you've completed an entire row of petals all the way around
9. Poke your glue gun in here and there to secure the flower
10. With your remaining fabric you'll now secure the base of your flower and the top of your stem by winding the fabric around, gluing when appropriate.
11. Voila! Your little burlap flower!
12. Now personally I like these flowers just on their own, but if you'd like to add a little color to your bud you can add a small piece of ribbon and a pearl pin in the center. If you're making your bouquet like in the first photo, assemble a few burlap flowers, trim the ends and wrap with ribbon. It's THAT easy.
You see? I told you LaBelle Bride was fabulous! To see a short video tutorial of this great project head on over to LaBelle Bride.
